Products in Gatum are presets that let you manage routing and pricing for multiple clients at once. Adding a route to a product means all clients on that product will automatically use it for sending traffic.
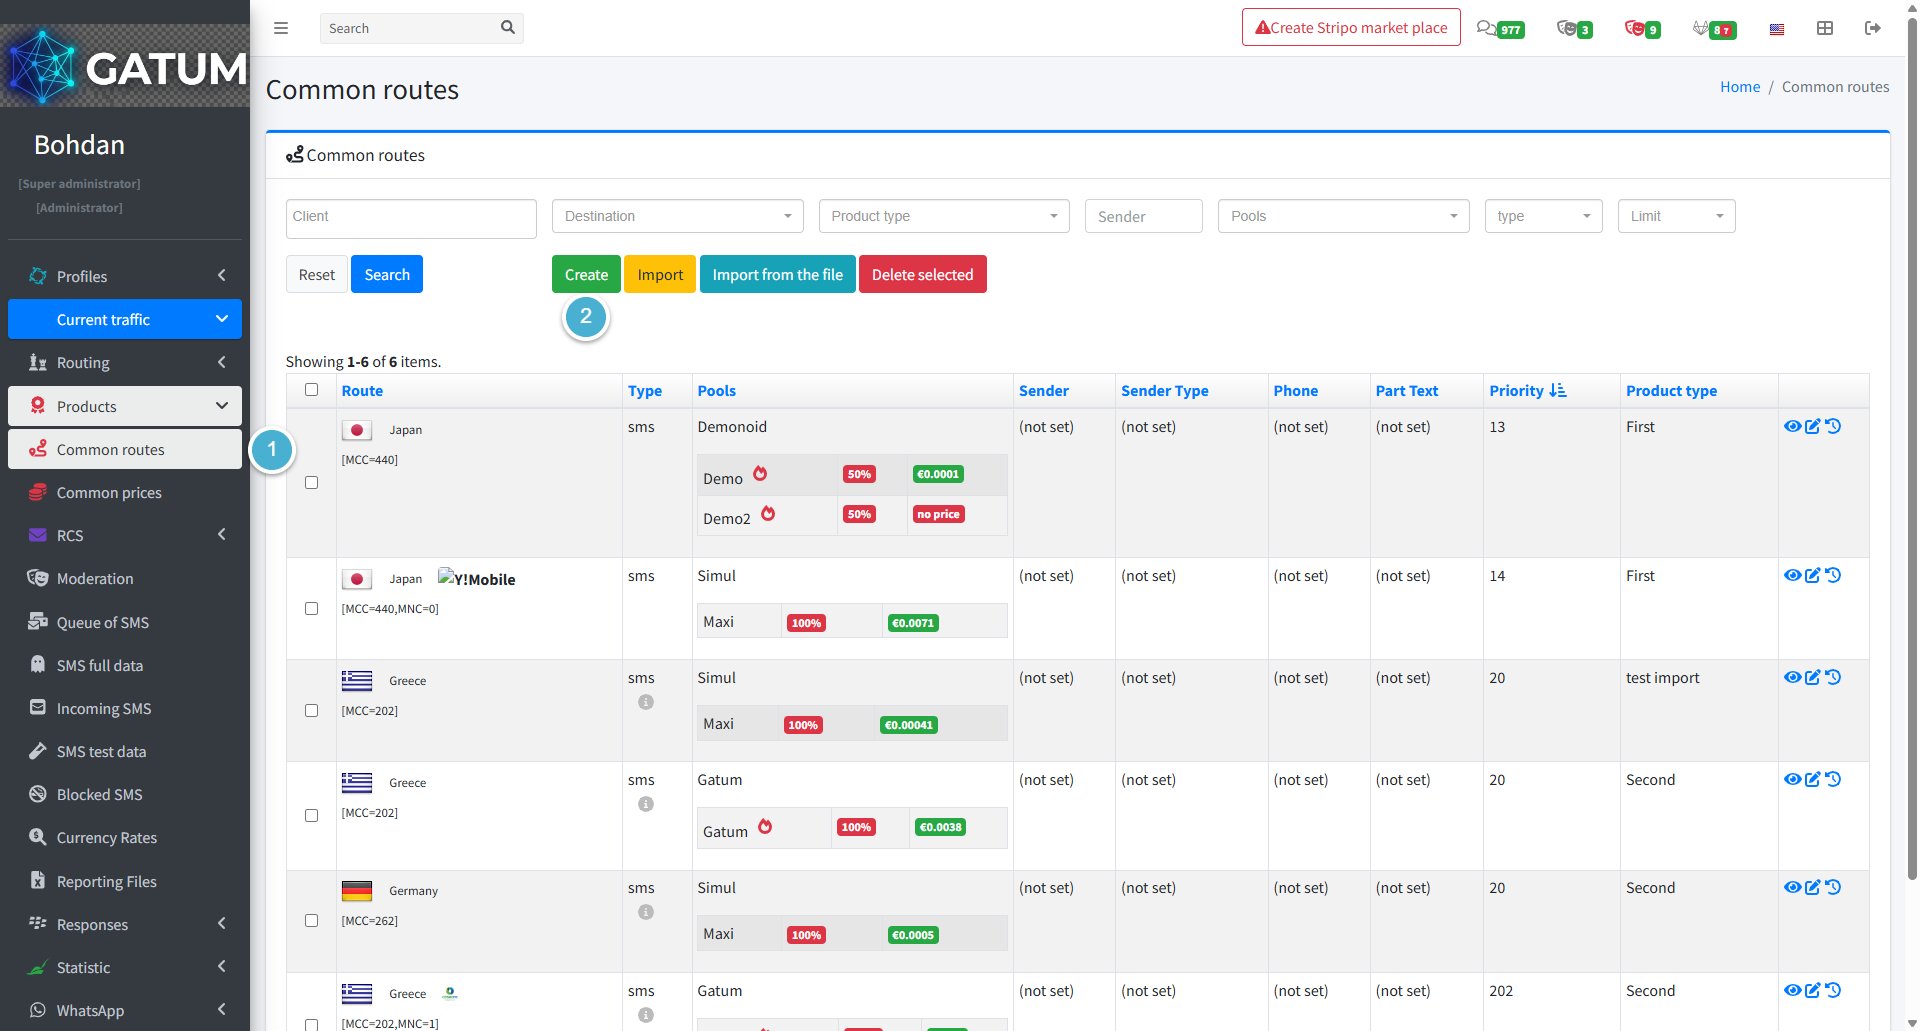
Go to Current Traffic → Products → Common Routes.
Click Create:
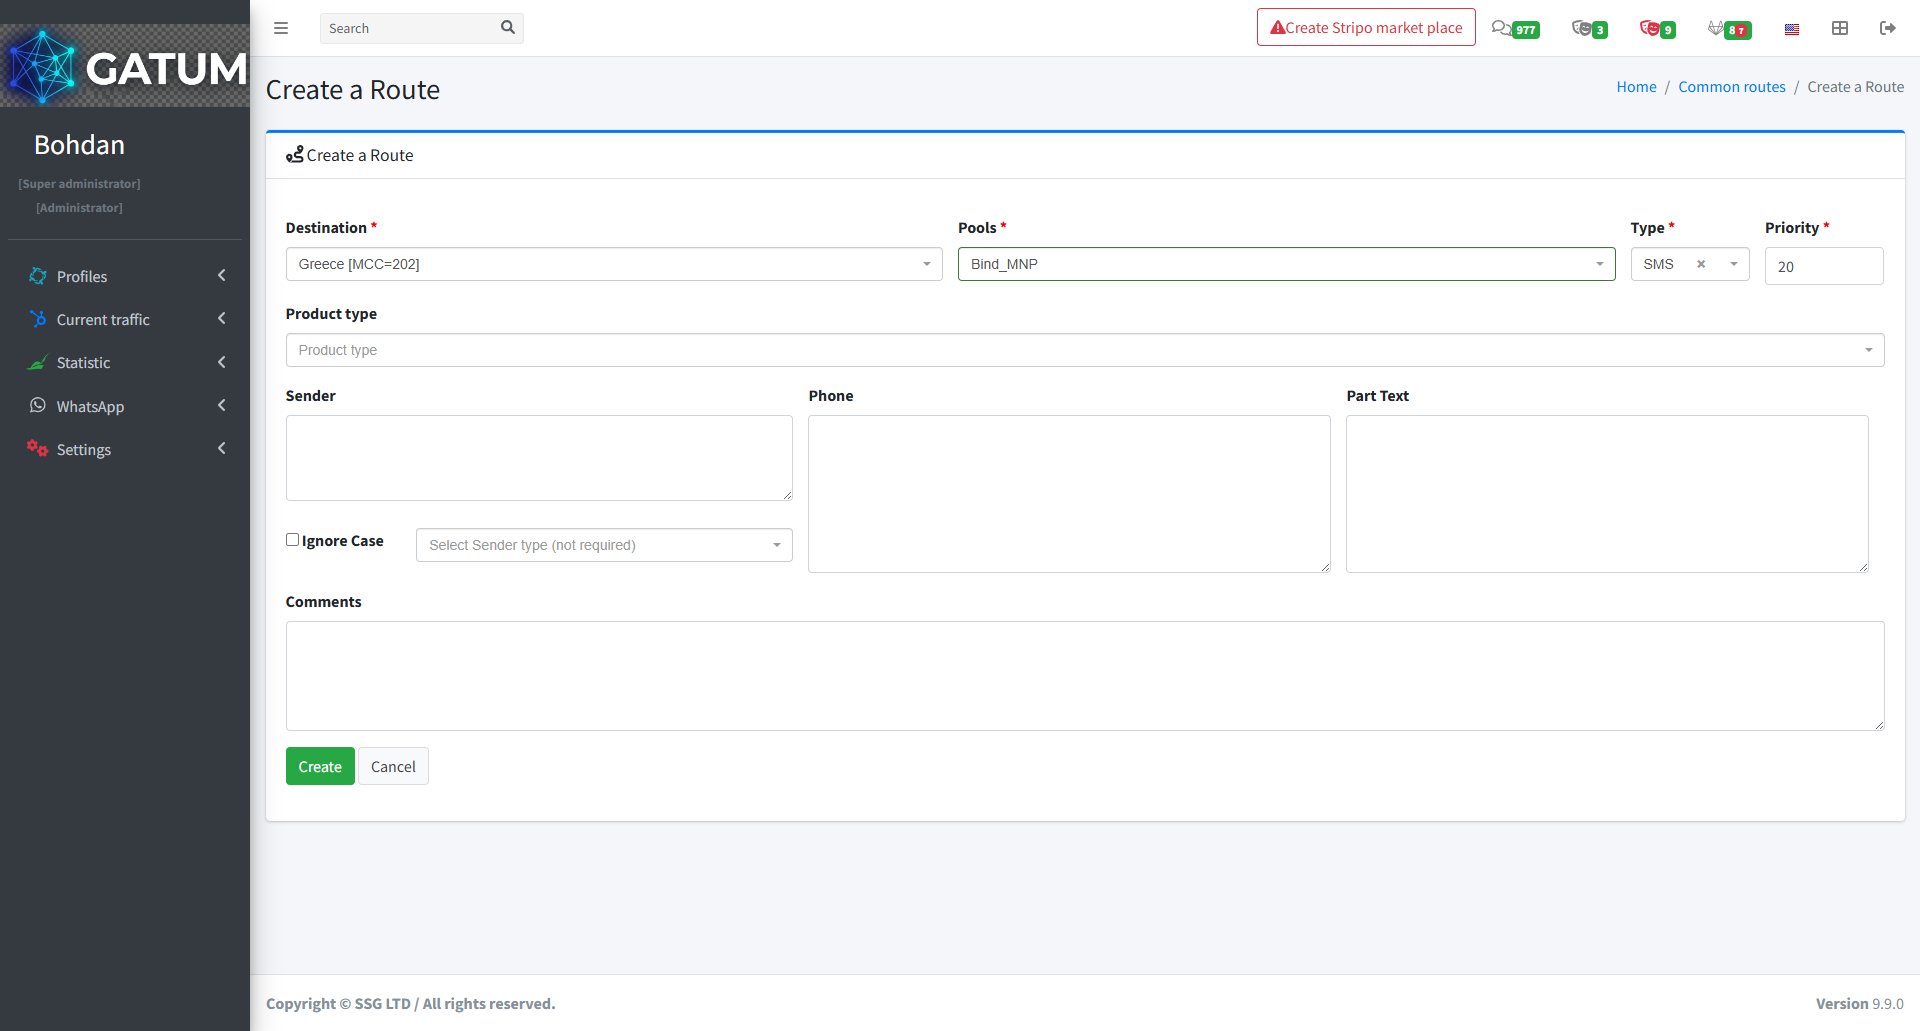
In the window that opens:
Fill in the fields:
Field
Description
Destination
The country or network this route applies to
Pools
The pool that distributes traffic between aggregators
Type
Message type for this route (e.g. SMS)
Priority
Order in which routes are used — lower number means higher priority
Product type (optional)
The product this route will be assigned to
Sender (optional)
Restrict this route to a specific sender name
Phone (optional)
Restrict this route to a specific phone number
Part Text (optional)
Restrict this route by message content
Ignore Case (optional)
Ignore case when matching the sender or text
Sender type (optional)
Restrict this route to a specific sender type
Comments (optional)
Internal notes for this route
ⓘ
A route with priority 20 will be used before one with priority 100. Use this to control which route gets traffic first when multiple routes match the same destination.
Click Create.
How to Import Routes from a File
If you have a large number of routes to add, you can upload them all at once using a CSV or TXT file.
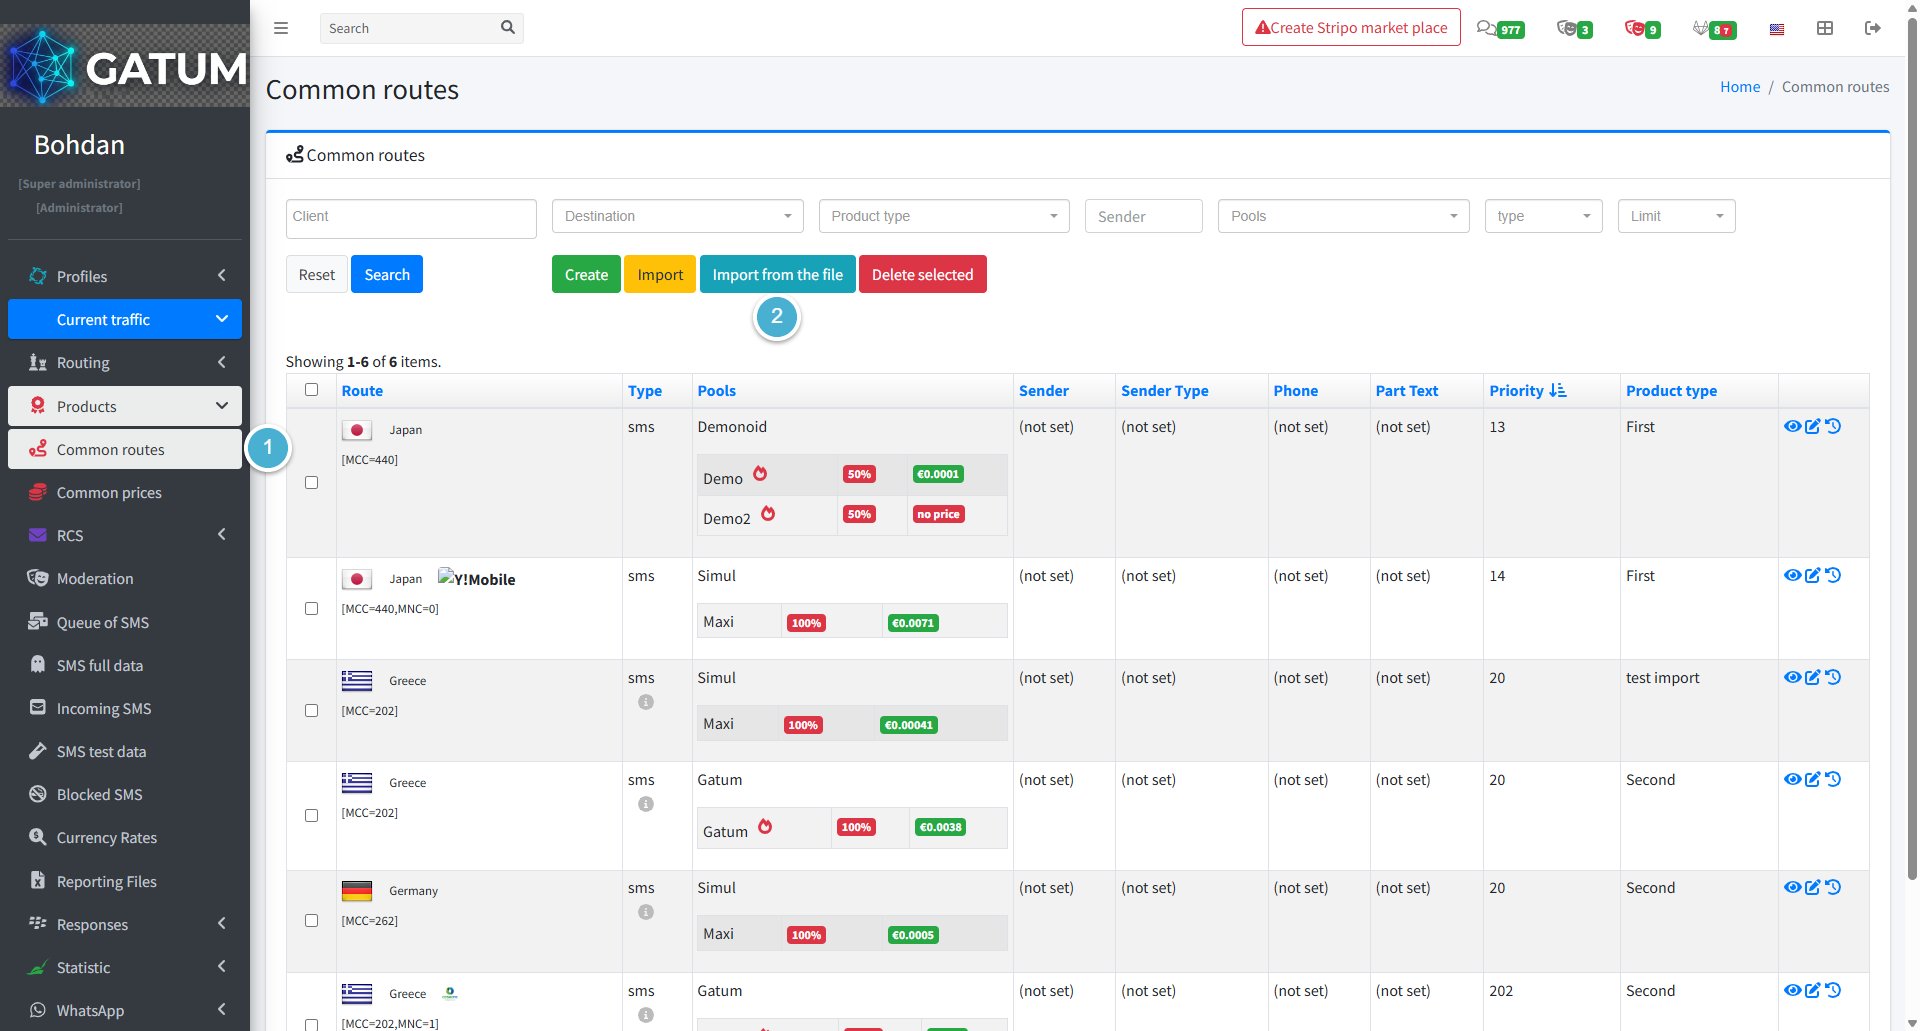
Go to Current Traffic → Products → Common Routes.
Click Import from the file:
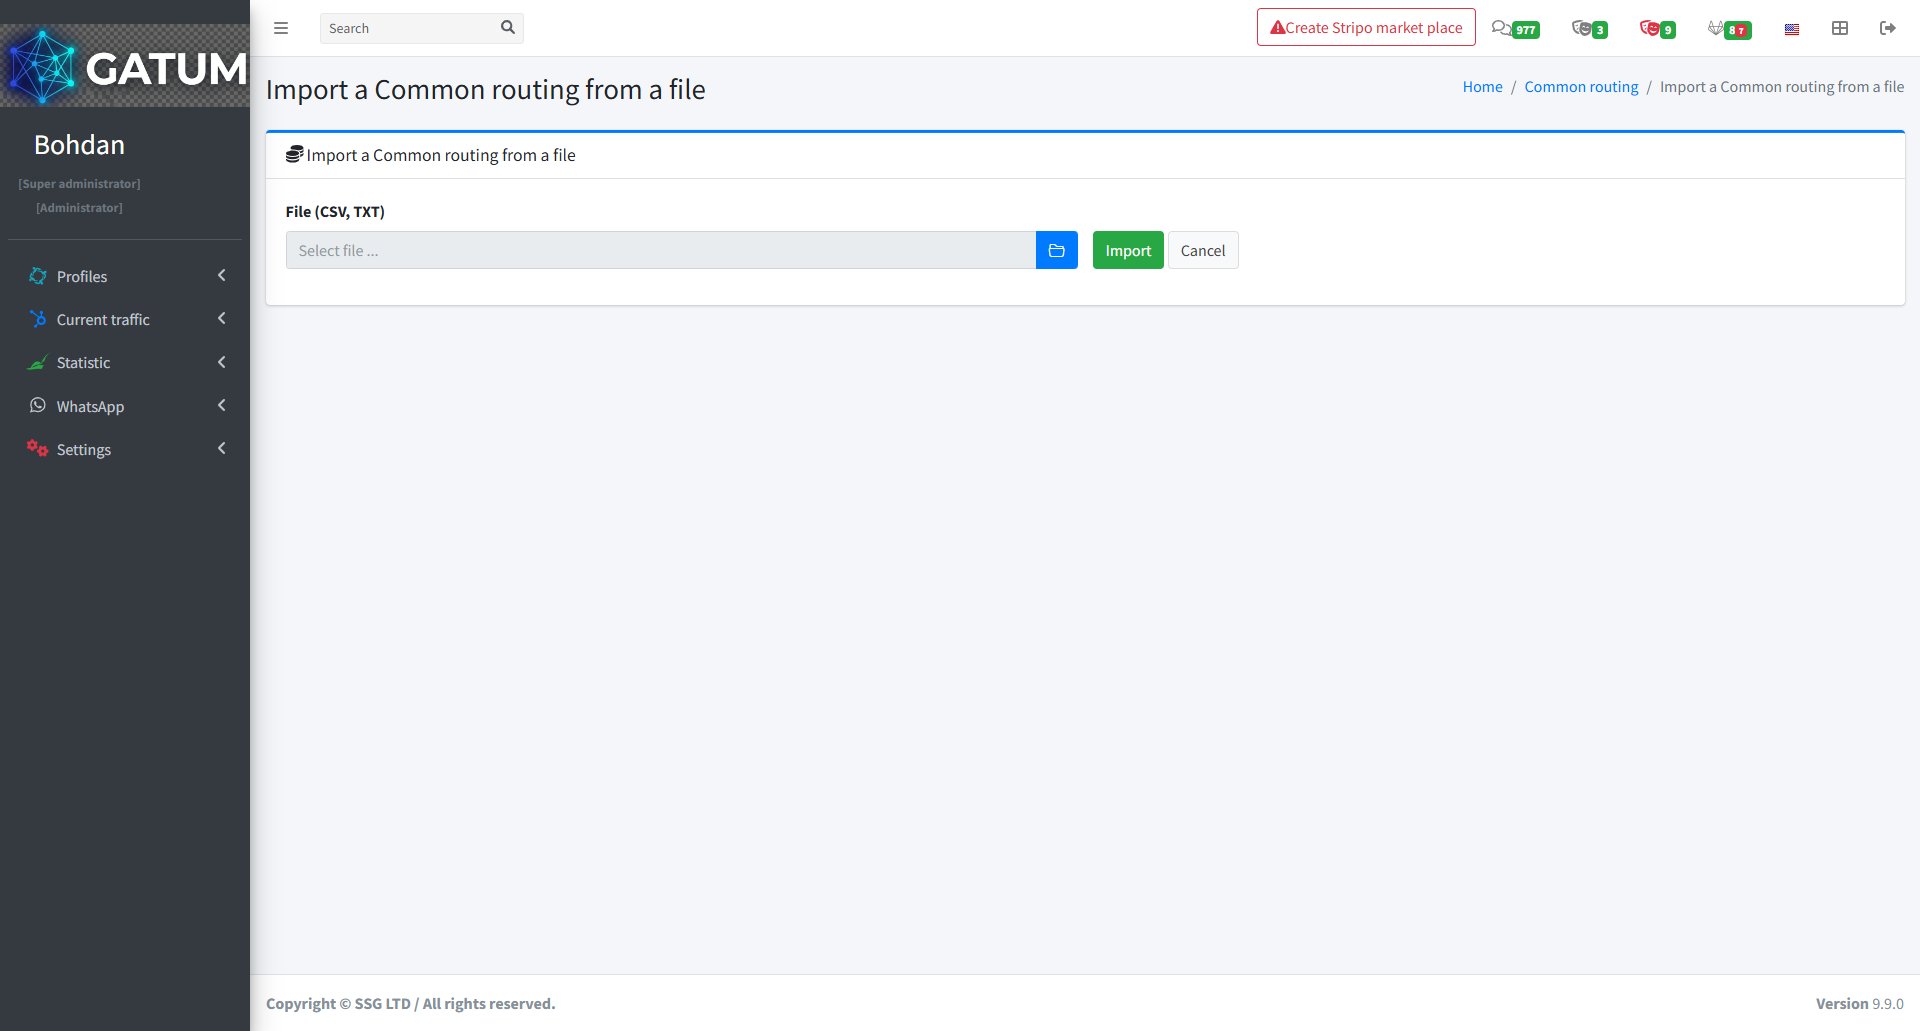
In the window that opens:
Click the folder icon to select your file, then click Import.
The route will appear in the Common Routes list and will apply to all clients assigned to the selected product.
When a message is held for review instead of being sent immediately, it means it was caught by one of the platform's moderation mechanisms. Understanding why this happens helps you manage traffic more effectively and configure moderation to match your workflow.
Reason 1:...
Why do SIDs get moderated, and how to set it up?
Sender ID moderation lets you control which sender names your clients can use. When it's enabled, a client can't send SMS with a new sender until you approve it. This helps you keep traffic clean and avoid unexpected sender names going out.
Go...
Why Do SMS Get Into the Waiting List?
When there is not enough balance to send all messages in a campaign, the platform automatically moves the unsent SMS to the Waiting SMS queue instead of dropping them. Once you top up your balance, you can resend them manually.
For example, if...
Cookie declaration last updated on 01/01/2025
This website uses cookies
We use cookies to enhance your browsing experience, provide social media features, and analyze our traffic.
You consent to our cookies if you continue to use our website.