How to Schedule an SMS to Be Sent at a Specific Time?
12.06.2026
You can schedule SMS campaigns to be sent at a specific time or within a set time window. All scheduled messages are saved in the SMS Scheduled section, where you can monitor and manage them before they go out.
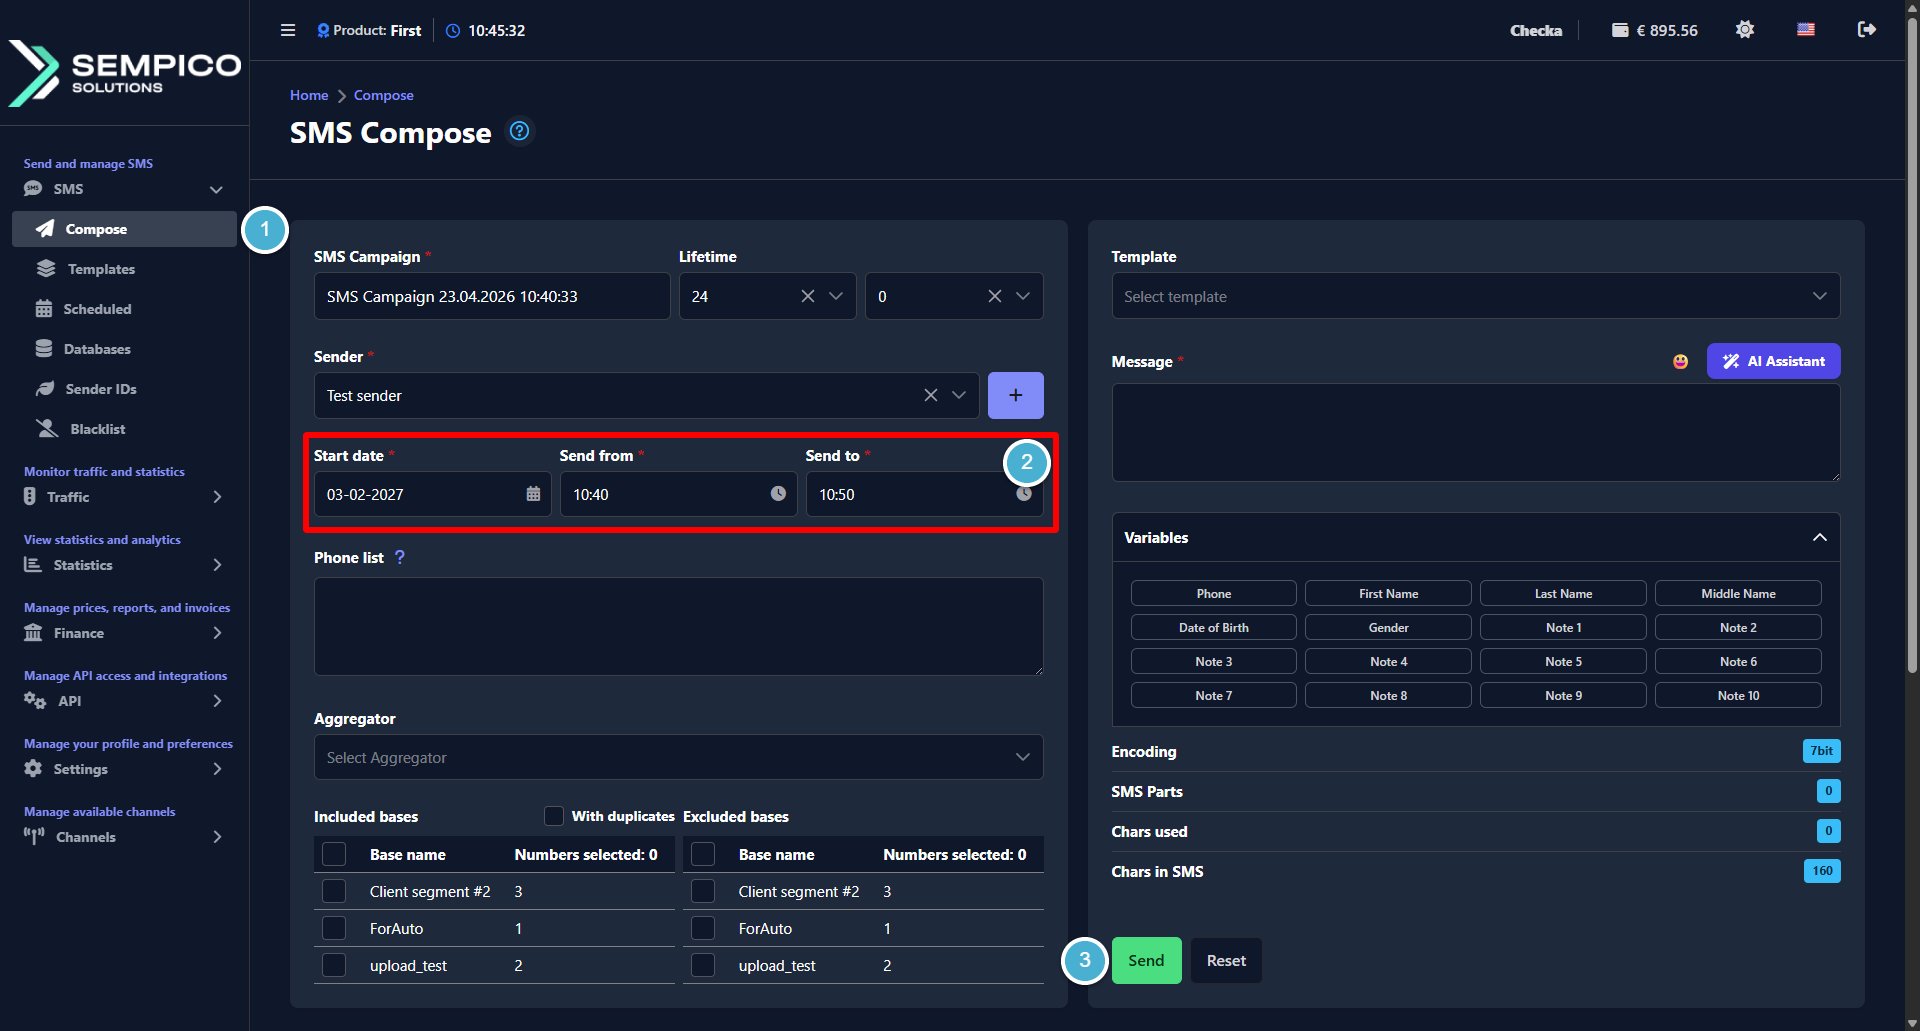
Step 1: Set Up the Campaign
Go to SMS → Compose.
Fill in all the required fields: SMS Campaign, Sender, Phone list or Included bases, and Message, and set the sending schedule using the following fields:
Field
What to do
Start date
Set the date when the campaign should be sent. For example, 03-02-2027
Send from
Set the start time of the sending window. For example, 10:40
Send to
Set the end time of the sending window. For example, 10:50
If you set the same time in both Send from and Send to, the campaign will be sent at that exact time.
If you set a time range, messages will be distributed evenly across that interval.
Click Send:
The campaign will be saved and will wait until the scheduled time to go out.
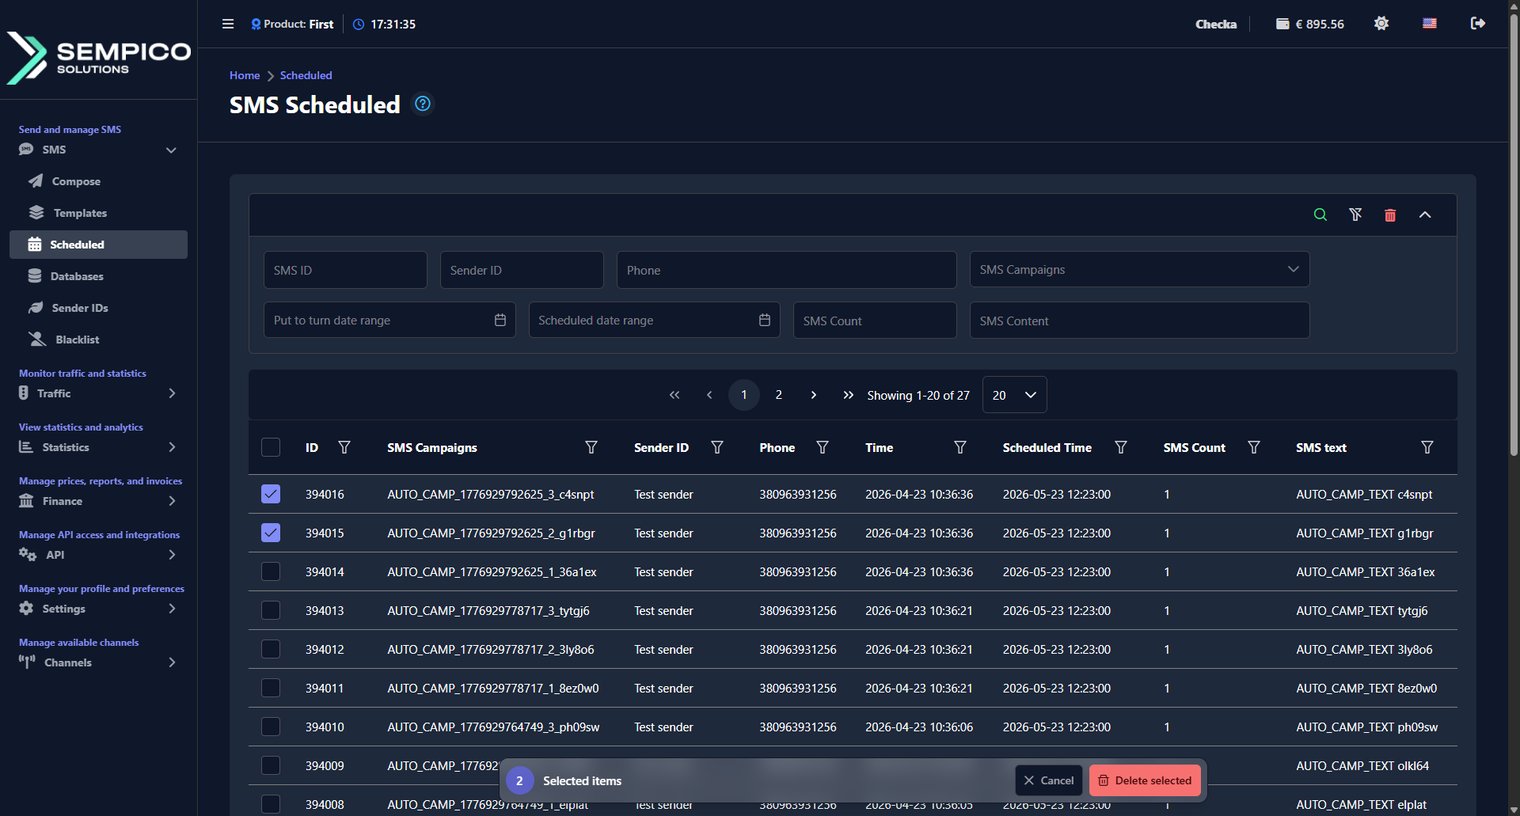
Step 2: Manage Scheduled SMS
Go to SMS → Scheduled.
Here you can see all scheduled campaigns. Use the filters — SMS ID, Sender ID, Phone, SMS Campaigns, Scheduled date range, SMS Count, or SMS Content — to find specific messages.
If you need to cancel selected campaigns, check the checkboxes next to them and click Delete selected in the bar that appears at the bottom of the page. To cancel all scheduled messages at once, click the red trash icon in the top right corner.
SMS is a simple and familiar communication channel. Most of us remember old mobile phones thatshowed a character counter while typing a message. Today, smartphones often hide this counter,but the technical limits of SMS have not disappeared.For anyone who works...
Sempico Solutions SMS Integration with ActiveCampaign
Sempico Solutions SMS is available as a Partner App integration for ActiveCampaign.
The integration allows businesses to add SMS communication to ActiveCampaign automations and use Sempico Solutions as an external messaging channel for customer communication, lead engagement,...
Sempico Solutions SMS Integration with Fast Track
Sempico Solutions can be integrated with Fast Track CRM through Fast Track’s Custom SMS Solution framework.
The integration enables iGaming operators to use Sempico as an SMS delivery layer for CRM activities, lifecycle automation, player engagement campaigns,...
Cookie declaration last updated on 01/01/2025
This website uses cookies
We use cookies to enhance your browsing experience, provide social media features, and analyze our traffic.
You consent to our cookies if you continue to use our website.