How to Create and Send SMS from the Client’s Web Panel?
12.06.2026
The Gatum web panel lets you create and send SMS campaigns manually — without any API or SMPP connection. You can send messages immediately or schedule them for a specific time.
Before You Start
SMS sending via the web panel is only possible if your account has been correctly configured by your Gatum manager. If you're unable to send campaigns, contact your manager to verify your account settings.
How to create and send SMS?
First, you define the campaign settings, then choose recipients, prepare the message text, and finally review recent sends if needed.
Let's go through these sections step by step and see what needs to be filled in to send a campaign.
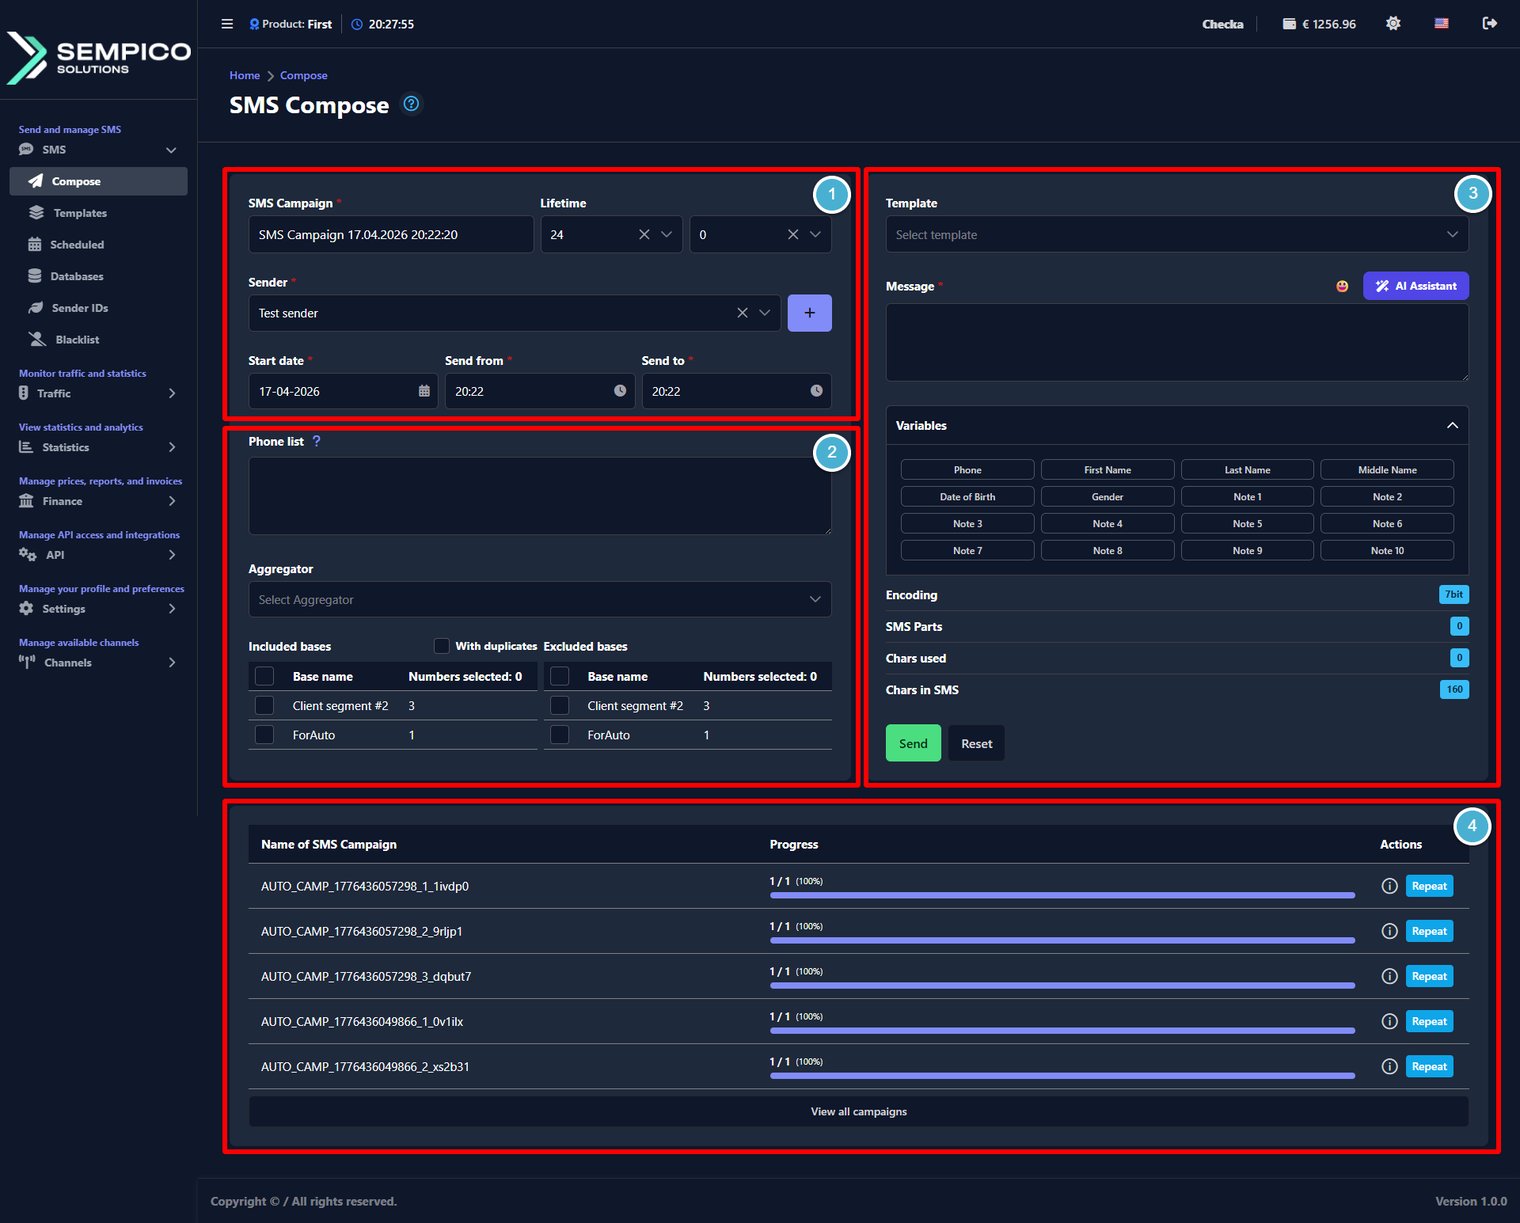
Step 1 – Configure the campaign
First, configure the basic campaign settings:
[SMS Campaign*] (required)
In the [SMS Campaign*] field, enter a name for your campaign. This name is used later in reports and campaign history, so it's worth making it clear and easy to recognize.
ⓘ
For example, you can use Promo_Austria_21.02.2026. A simple format like Purpose_Audience_Date usually works well.
[Lifetime]
Use the [Lifetime] field to set how long the campaign stays active for sending. The value is set in hours and minutes.
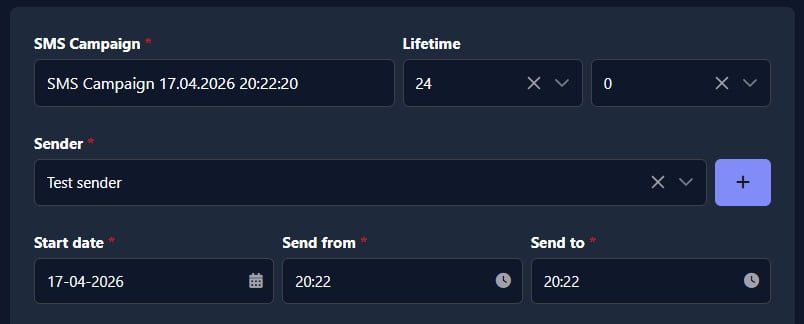
[Sender*] (required)
Choose a sender in the [Sender] field.
Depending on your account settings, this can be a Sender ID (alpha name), a phone number, or another available sender type.
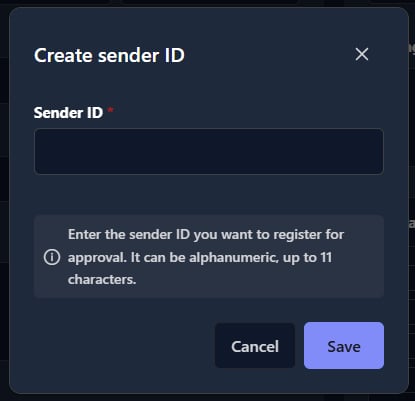
If you need to add a new sender, click the [ + ] button next to the [Sender] field. In the opened window, add a new Sender ID, and click the [ Save ] button:
ⓘ
Depending on your account settings, a new sender may be added immediately or sent for admin moderation. If moderation is enabled, the sender becomes available only after approval.
[Start date/time*] (required)
Use [Start date], [Start from], and [Start to] fields to define when the campaign is allowed to send messages.
When you click the [Send] button, the system checks the current time against the selected window. If the time is already active, sending begins immediately. If the time is later, the campaign is scheduled.
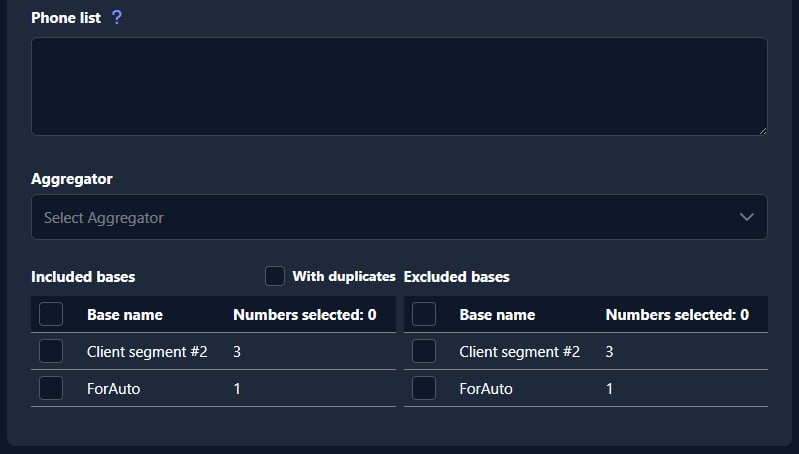
Step 2 – Select recipients and routing
Continue by choosing who will receive the message and how the campaign should be routed:
[Phone list]
Use the [Phone list] field if you want to enter phone numbers manually instead of sending to saved contact bases. The system accepts only the international format.
ⓘ
To see the formatting rules, click the small help icon [ ? ] next to [Phone list].
[Aggregator]
Use the [Aggregator] field to select a specific supplier/provider for sending this campaign.
If no aggregator is selected, the system uses the default routing configured for your account.
[Included bases]
In [Included bases], select with check boxes the contact bases you want to send the campaign to.
[Excluded bases]
In [Excluded bases], select with check boxes the contact bases that should be excluded from this campaign.
[With duplicates]
If this checkbox is not enabled, the system sends only one message per number, even if the same number appears in several bases.
ⓘ
Remember that you need to choose at least one phone number for sending. It doesn't matter, will it be from the [Phone list] field or from the [Included bases] section.
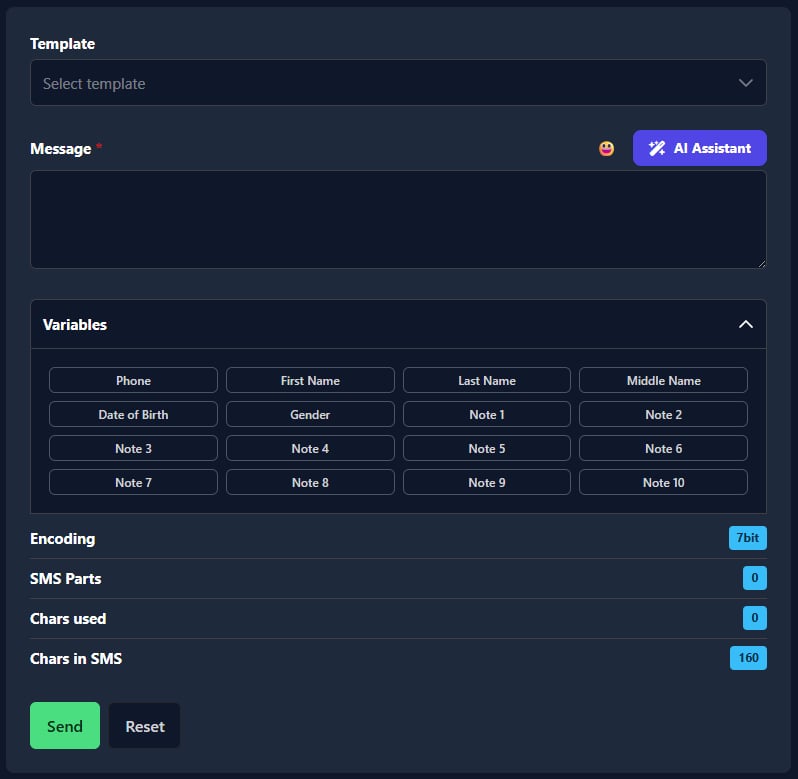
Step 3 – Create the message
In this section, you prepare the SMS text: choose a template, write or edit the message, insert variables, and review message counters before sending.
[Template]
Use the [Template] dropdown to select a saved message template from the dropdown list.
[Message*] (required)
This is the main section where you create the text of your SMS campaign.
You can prepare the message in a few ways:
write the text manually in [Message]
select a saved [Template] from the dropdown
insert personalization fields using [Variables]
Use the emoji button next to [Message] to insert emojis into your SMS text.
If you choose a template in the [Template] field, its text is inserted into the [Message] section automatically, and you can edit it before sending.
ⓘ
A common workflow is to select a template first, then adjust the text manually for the current campaign.
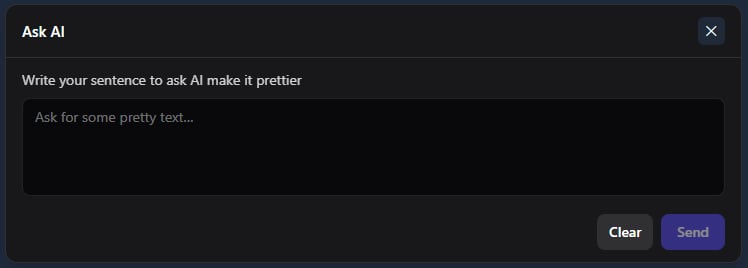
[AI Helper]
Use this feature if you want help writing or improving the text. It can help you make the message clearer and more polished.
Click the [ AI helper ] button and in the opened window, write the desired text, and click the [ Send ] button:
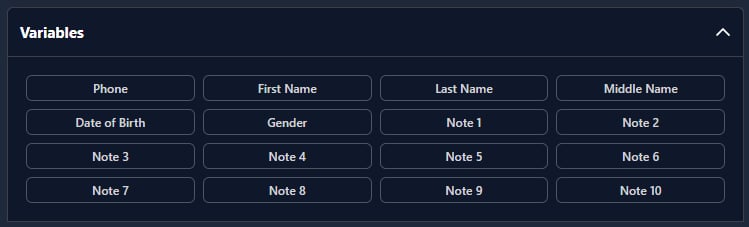
[Variables]
Use the [Variables] dropdown to insert data from your contact base into the message.
This allows you to personalize the same SMS for different recipients — for example, by inserting:
phone number
first name
last name
date of birth
and other available fields from the selected base
Click the [ Variables ] dropdown to hide or show the options:
When you choose a variable, the system inserts a placeholder into the message text. During sending, this placeholder is replaced with the actual value from each contact record.
ⓘ
Variables work correctly only when the selected recipients come from a contact base that contains these fields.
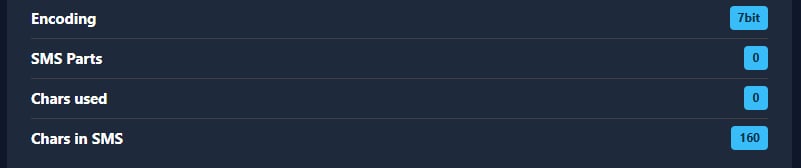
[Message counters]
These indicators help you check whether the message will be sent in the expected format and how many SMS parts it will use.
Pay attention to these values while writing your message:
[Encoding] – shows the current encoding (for example, 7bit)
[SMS Parts] – shows how many SMS parts the text will be split into
[Chars used] – shows how many characters are currently used
[Chars in SMS] – shows the character limit for the current encoding
These values update automatically when you type or edit the message.
Why this matters:
if encoding changes, the character limit per SMS will change
if the text becomes too long, the message will be split into multiple SMS parts
this affects how the final message is delivered and how many SMS are sent in total
[ Send ] and [ Reset ] buttons
When the campaign settings and message are ready, click the [ Send ] button to start sending (or schedule the campaign, depending on the selected time).
If you want to clear the form and start over, click the [ Reset ] button.
Step 4 – Review and reuse recent campaigns
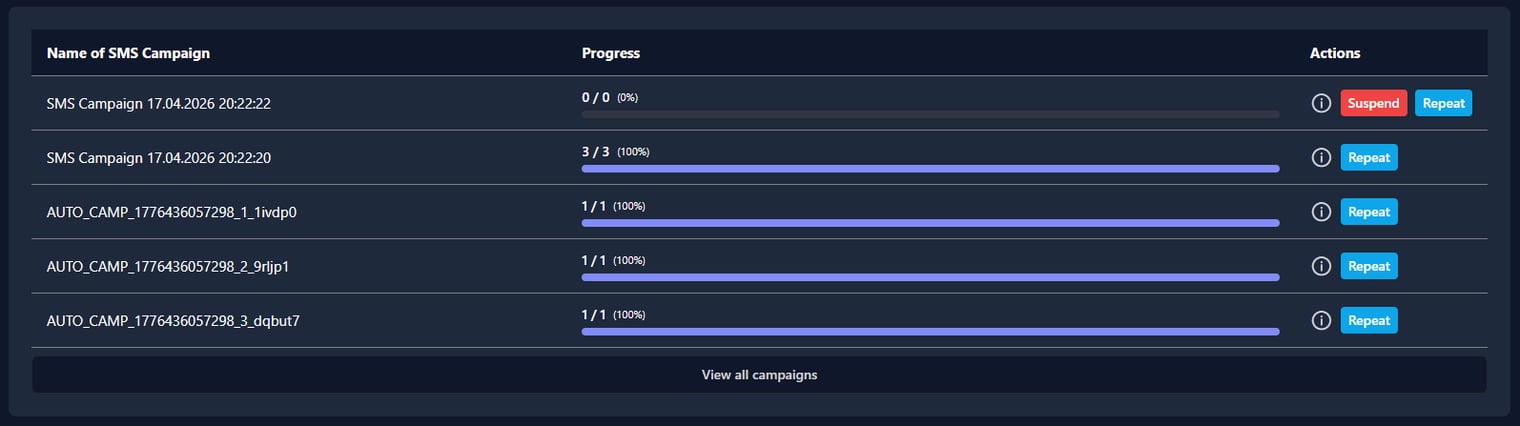
At the bottom of the page, you can see recent campaigns created from the Compose section.
The table shows the campaign name, its progress, and available actions. In the [Progress] column, you can see how many messages were sent out of the total number of recipients, along with the percentage.
You can also use quick actions:
[i] to open campaign information/details
[Resend] to send the campaign again
[Restore] to restore the campaign settings (if available)
[Suspend] to stop the sending campaign
Click the [ Repeat ] button to resend a campaign or click the [ Suspend ] button to terminate sending.
To open the full campaigns page, click the [ View all campaigns ] button below the table. You will be redirected to the SMS Campaigns page.
You can update your personal details and change your password directly from the web panel at any time.
How to Edit Profile Information
Go to Settings → Profile.
Click Edit:
On the page that opens:
Update the necessary fields:
FieldDescriptionTimezoneYour...
Where Can a Client Get an Invoice for Payment?
Invoices are generated by your Gatum manager and sent to your web panel automatically. You can view and download them at any time without contacting your manager.
Go to Finance → Invoices.
Each row in the table shows one invoice:
ColumnWhat...
Where Can a Client View All Their Payments?
The Financial Report page shows a full history of all payments credited to your account. You can check the amount, payment method, status, and dates at any time without contacting your manager.
Go to Finance → Financial Report.
Each row...
Cookie declaration last updated on 01/01/2025
This website uses cookies
We use cookies to enhance your browsing experience, provide social media features, and analyze our traffic.
You consent to our cookies if you continue to use our website.